Thursday, May 28, 2009

Zebra Swallowtail Butterfly


Of all the swallowtail butterflies that call the state of Tennessee home, this one has eluded me for the past 10 years that I've taken an active interest in the natural world. That is until a few days ago.
I was lucky enough to capture these images while the butterfly was feasting on clover. It didn't seem to mind that I followed it as it moved from flower to flower, amazed at how beautiful it is up close (look at the stripes on its little body!). All the while I was hoping that the batteries in my camera would hold up just a little bit longer...then suddenly it flew off into the woods. A totally magical few minutes of my life! Thank you my stripped little flying friend. I'll remember you forever.

Wednesday, May 27, 2009

Sometimes timing is everything


Yesterday afternoon, I took a break from working in the shop to enjoy a few minutes on the front porch. Something small caught my eye making its way across the road. So, I had to go investigate. I grabbed the camera and looky what I found! A young box turtle! I've been waiting all year to see these guys.
He crossed the road successfully and stopped to take a rest in gutter of the road. Even though we don't get much traffic through here, I knew it wasn't a safe place for him to be. The road is narrow and when two cars come upon each other, each one has to make way for the other--by veering into the gutter of the road. I picked him up to check him out....


...then moved him a few more feet away into my backyard
where he can be safe and sound. Just a minute later, two cars came through at the same time...wouldn't you know it, one car rode in the gutter to get around the other. Whew!! Mr. Turtle had a lucky day for sure!


Here are two more finds from the yard yesterday. Snail are everywhere this year, I've never seen so many!


Loads of toads, too. Big ones, small ones. I dig toads!

Tuesday, May 26, 2009

Let's make us some kitties-step 7-paint it


Well, we're at the last step and almost done! Just one thing and that's to paint in the eyes. I use a gloss black enamel paint for the eyes. They can be a bit tricky. First, I'm not a painter by trade. Second, painting on a curved glass surface feels a bit odd. Third, I've got to try and get both eyes to look somewhat similar.


And here it is ready for photographs and a new place in my Etsy store.

Let's make us some kitties-step 6-patina it


In order to darken the lines of this cat, I'm using black patina. Patina is a chemical mixture that reacts with certain metals and gives them a superficial coating.


Here it is being applied with a cotton swap to the lead came. Care is taken not to slop it all over the place. The lead came along with all the solder lines are treated front and back.


Here is what the black kitty looks like with patina applied.


And and orange and white tabby that I've been working on at the same time.

Let's make us some kitties-step 5-wrap it


Whew, only a couple of more steps to go! The next thing we are going to do with this black kitty is to wrap it up with lead came. Lead came is available in various widths and channel depths and styles. For this project we are using "U" channel lead. Its actually shaped like the letter U. It is flexible but strong and adds quite a bit of stability to this piece.
First, I fit a piece for the area between the ears.


You can see in this picture a cross section of the lead came.


Next, I'll roll the cat face in a section of lead came. This helps to seat the glass in the channel groove.


Where the two sections of lead meet at the points of the ears...


...I solder this joint together.


Finally, I solder a jump ring to the back of the cat face. We're almost done. Next step, patina it.

Monday, May 25, 2009

Let's make us some kitties-step 4-solder it


We're ready to solder the black kitty together. Here we have everything we need for this step. Clockwise from the top-liquid flux, temperature controller-or rheostat (this regulates the soldering iron), solder iron in holder, flux brush, solder-I use 60/40 solder and a wet sponge for cleaning the solder tip.


I start by applying the liquid flux with the brush to small spots at first so that I can tack solder the pieces together. Sorry, there is no one here to help with pictures so there are no action shots!


Next, I apply the flux to all the copper foil joints and solder all the pieces together. There is a chemical reaction that takes place between the copper foil, the flux and hot melting solder. The melting solder forms a bead that cools quite quickly and creates a bond between the pieces of glass.


We allow the front side to cool, flip it over and solder the backside. Once this step is complete we can move to the next step-wrap it.

Let's make us some kitties-step 3-foil it


In the copper foil, or Tiffany method of working in stained glass, every glass piece is wrapped with self adhesive copper foil. Copper foil is available in various widths and thicknesses along with different color backings. For this project I'm using both 7/32" and 3/16" copper backed foils depending on the thickness of the glass pieces. For the glass glob eyes I use 1/4" thick black backed foil.


Copper foil shown with a burnishing tool.


The trick is to apply the foil evenly over the edge of the glass so that an equal amount remains to be folded over for both the front and the back of the piece since both sides will be soldered. This will assure that the solder lines look even.


Once the foil is applied, a burnishing tool is used to smooth the foil and to eliminate wrinkles and bubbles.


Here is just one of the pieces, the kitty nose. The pieces that are in the center of the project are wrapped completely around with foil. The pieces that are on the outside are wrapped only where they butt up to the neighboring piece as shown in the very first picture. Next, we can move to the next step--solder it.

Saturday, May 23, 2009

Let's make us some kitties-step 2-cut and grind


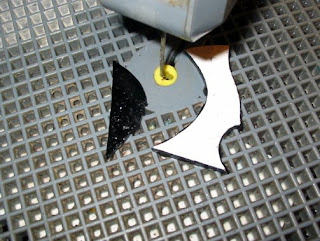
After the glue has set up between the paper pattern pieces and the glass I can go ahead and cut all the pieces of the cat apart. For simple glass hand cutting, I use a pistol grip cutter. Its not really cutting the glass, but scoring the glass, then the unwanted piece can be broke off.


This is how the kitty looks after hand cutting.


For more acute angles, I use a glass ring saw. Its a great tool that can cut glass and other materials with ease. Without this saw sharp angles would be difficult or even impossible to cut.


The next step in the process is to grind each piece of the puzzle to fit next to the neighboring piece tightly. Here is where a glass grinder comes into use. The glass piece is simply pressed against the rotating grinder head until the unwanted glass is removed.


All of the glass pieces are fit against the original pattern and checked to make sure that they all fit tight.


Here is a view of the cat the shows the texture of the glass. The next step in the process is to foil it.

Its Caturday-let's make us some kitties-step 1


Over the course of the next few days, I'm going to outline the steps involved in creating the stained glass cat face ornaments that I offer for sale in my Etsy store. I have a few different patterns that I use for these kitty critters, the one shown here is the fat faced version. First thing I do is make a carbon copy of the pattern onto brown craft paper.


Next, I search through colored glass globs and find two that are about the same size and shape for the eyes.


I outline the shape of the eyes onto the pattern and designate which eye is left and which is right. The pattern pieces are also numbered and show their direction in relation to the pattern of the glass.


The craft paper pattern is then cut apart with scissors. This photo also shows the type of glass I'm using for this particular cat. It is a black wavy glass called Waterlglass. I'll use this for all of the pieces except for the nose, chin and both ears. For those parts I'll be using a flat textured black glass.


All of the paper pattern pieces are then glued down to the glass using regular glue stick. This keeps the pattern pieces from moving during the next step--cut and grind.

Tuesday, May 19, 2009

These cats ROCK-CynthiaKayoDesigns on Etsy

Last week I came across a new Etsy seller-CynthiaKayoDesigns. Her shop is just lovely. Being a big time cat lover, I just fell in love with her hand painted cat rocks. The big bold eyes are just beautiful and I love all the detail found on her creations. These would make a great gift either for yourself or someone you love.

Cynthia says that she has been painting these kitty creations since 2002. Her first adopted tabby cat, Koko was her inspiration. She finds her rocks locally in Vancouver, British Columbia, while walking her dog along beach areas, like Barnet Beach, Kits Beach or the Fraser river. Cynthia says that these river rocks are smooth and easy to work with.

Check out these wonderful cat rocks and the other lovely items in her shop HERE.


Sunday, May 17, 2009

Flea market Sunday

Last week, I promised my husband that if the weather was good today, Sunday, that I would go with him and help him set up his stuff at a local flea market. I really wasn't crazy about the idea-basically it was the idea of waking up super early that made the idea crazy. But, after some thought I decided that it would be a great opportunity to get out of the house and take some pics of cool stuff I know is going to be there.

The first cool thing I came upon was this Mallard Duck lamp. Too bad they had placed the sales sticker right over the eye. This piece stood about 16 inches tall and lit up from the back. If I had had $45 this would have been mine.


The next cool thing to catch my eye was this unicycle. I haven't seen one in years, never tried it-I'm sure I'd break my neck. Cool find for $20.00


Wow! Led Zeppelin on vinyl! Why didn't I buy this? The cover is so cool-only $5.00-this totally takes me back to my childhood in the '70's.


Bottle time-I love bottles! This one was really cool~why didn't I buy this? It was only $4.00, a Beam whiskey decanter in the shape of the State of New Hampshire.


This was a cool green plate with a nice fish and a seahorse for only $2.00. I should have bought this.


This was a crazy ax blade and super sharp, too. The sellers had this strategically positioned to cut your gut if you leaned over the table. I never found out how much they were asking for it...cool piece anyway.


Carnival glass--oooo, I love this stuff. I should have bought this, it was only $4.00. I think there should have been a lid, doesn't matter, still a beautiful item.


The same seller who had the carnival glass had this really pretty Jadeite vase. It was only $10.00 I really should have bought this.


Now, here's something you don't see everyday. A yellow bottom section of a manaquin with a missing foot and blue boxer shorts. No one was selling this, it was just kinda hanging around in the middle of nowhere. This was so well worth getting up early for!


Old enamel slop pot~really nice condition for $10.00 The ones I usually see have lots of chips in the enamel. This one still has the wooden handle.


Being a country flea market, there was plenty of livestock for sale. Here are some ducks or geese, not sure. They also have turkeys, roosters and chickens. This section of the sale kinda bothers me-so I was out of this area pretty fast.


Old phonograph, made by Brunswick. The seller never could come up with a price, I guess they really didn't want to sell it. It was cool to look at anyway.


This was a good find for $10.00--no chips, or cracks--everything was really nice about it. I really should have bought this, I just don't know what I would have done with it. Cookies don't last long enough in my house to make it into a cookie jar.


Did I ever buy anything at this flea market-you bet! My husband found this really cool cat bottle, but he wasn't sure if I would want it. What?!? Of course I would--its got my favorite things wrapped up in one package. Number one-its a cat. Number 2-its glass and number 3-its cobalt blue. Great find for $2.00!!

All in all it was a great day and I'm happy that I went.