Showing posts with label copper foil. Show all posts
Saturday, November 5, 2011
The black cat and the moon
Last week, I started working on a new panel to add to my Etsy shop. The idea for this piece came about as a lot of projects do and that's by doing some simple sketches, doodling really, with no real intent of creating anything but somehow things just start to fall into place. The original sketch for this was on scrap paper at about 3 inches tall. After some thought and erasing and adding and white out I finally came up with the plan that I wanted to use. Next came choosing the glass for it.
The glass I chose for the background sky is an interesting color~some of the time it looks purple, some of the time it looks blue~its always changing with any light behind it. At first I thought to do all of the parts besides the sky and the moon in black to appear as silhouettes. But, black is black and I was afraid that it would not be the look I wanted. I decided to use a dark amber streaky type glass for the trees and another type of dark amber for the ground, glass that is more dense than the tree glass. Of course, the kitty is black. One of my black kitties loves to sit in the big oak tree in the backyard~~maybe I was thinking of him when I starting doodling for this piece.
A few days into the project and all the pieces were cut, fit and foiled. Since its a rectangular piece I used rigid zinc channel to frame it.
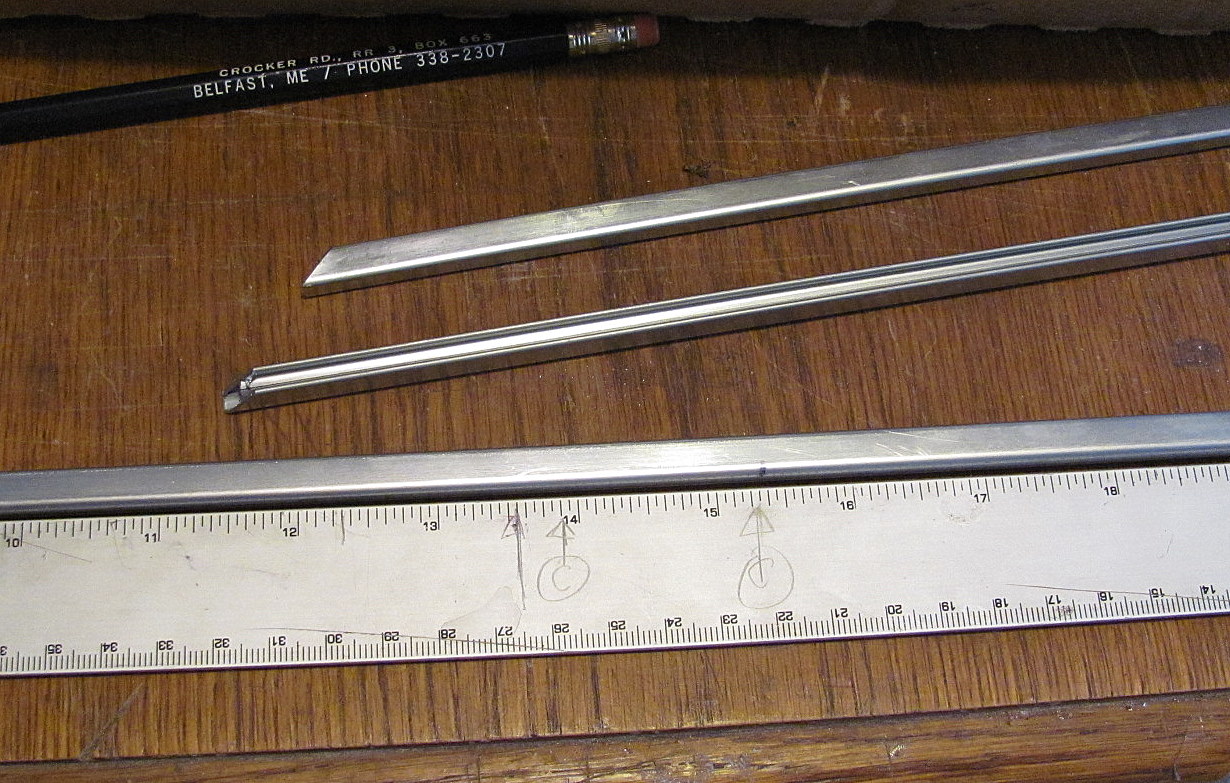
Once all the parts were reassembled back onto the pattern, I measured and cut the zinc. The ends were cut using a hacksaw and a miter box. You can see the open channel on the second piece up for the glass to set into.
Once completed, this Black Cat and Full Moon Panel measures at 15 3/8 inches tall by 14 inches wide, 39cm by 35.5cm. I've had a chance to study this piece for a few days now since its currently hanging in my living room with good southern exposure lighting coming through it. Sometimes I'm not sure if I've chosen the right glass to use for a project and with this piece the ambers were questionable. But, now I'm glad that I've used them in that when the moon glows the brightest and whitest with strong light behind it is when the trees and the ground glow the brightest as well~similar to the way an actual full moon lights up the ground beneath it.
Wednesday, October 26, 2011
I've brought the duck back
A few weeks ago, I met a most interesting duck at a local state park. I watched him as he would wait for fishing boats to be offloaded and then he would follow the boaters around the gentle cove but never venture out for to the main river. Around the cove he would swim, he was pretty fast about it. Finally, he came over to where I was at and I got to take a good look at him.
He's really a beauty--all black with feathers that are iridescent in the sun. His bill reminded me of a Mallard Duck, so I'm not sure if he's part domestic duck, part Mallard or what. There is a duck called an American Black Duck--but they don't look anything like this.
This duck got me thinking about bringing out an old pattern that I had done of a duck a few years back. I knew I wanted to make some changes to it before doing another. I played with the pattern a bit--made the cattails larger, changed the position of some of the grass and made those parts larger as well. One thing I wanted to do with the new duck was to use brighter colors for some of the features. The last duck I had done had darker colors which made it difficult to photograph.
The pattern I had developed was on a regular sized piece of paper-I enlarged it and got to making my copy. I thought it would be interesting to do something different with the eye. For that I chose to use a black glass glob, a/k/a glass gem, half marble. They are a bit larger than needed---I grinded the glob on all sides to fit and took a bit off the bottom of it as well so it wouldn't stick up way higher then the glass.
It was really very fun choosing all of the different colors for this piece. I thought also to use denser glass on the main features with the thought that this might be an interesting piece to hang on a wall since not everyone has big windows for big suncatchers.
After days of glass choosing, cutting, grinding the pieces and foiling them I was finally ready to solder everything together. This is an exciting time because once I have one side soldered I'll finally be able to pick the piece up and see what everything looks like together. The reverse side is then soldered and lead channel wrapped all the way around the piece.
I hung the duck up inside and thought it looked pretty good this way. It was then that I realized that I was not completely done~~~I still needed to hand paint some features onto the duck.
A little nostril and some lines by his webbed feet are what I added. I never realized how important this nostril is until I spent time watching that black duck. He seemed to blow air out of it when he had his bill in the water--kind of what people do when they swim.
I'm very happy with the outcome of this new Mallard Duck design, available for sale in my Etsy shop. This suncatcher panel measures 15 inches diameter, 38 cm.
Monday, May 25, 2009
Let's make us some kitties-step 3-foil it
In the copper foil, or Tiffany method of working in stained glass, every glass piece is wrapped with self adhesive copper foil. Copper foil is available in various widths and thicknesses along with different color backings. For this project I'm using both 7/32" and 3/16" copper backed foils depending on the thickness of the glass pieces. For the glass glob eyes I use 1/4" thick black backed foil.
Copper foil shown with a burnishing tool.
The trick is to apply the foil evenly over the edge of the glass so that an equal amount remains to be folded over for both the front and the back of the piece since both sides will be soldered. This will assure that the solder lines look even.
Once the foil is applied, a burnishing tool is used to smooth the foil and to eliminate wrinkles and bubbles.
Here is just one of the pieces, the kitty nose. The pieces that are in the center of the project are wrapped completely around with foil. The pieces that are on the outside are wrapped only where they butt up to the neighboring piece as shown in the very first picture. Next, we can move to the next step--solder it.
Subscribe to:
Posts (Atom)